We are fast approaching severe weather occurrences in our area. Unfortunately, rainy weather is when a roof leak is most likely to happen - or at least become a problem - and, further, unfortunately, when roofers become inundated with calls from panicked homeowners.
So, say your roof is leaking and you’ve contacted a roofer for help, but they can’t get to you immediately. What will you do? Actually, there are a few things you can do to to minimize the damage to your home’s interior as well as to your roof. A further win is that roofing companies often charge extra for emergency calls, but by you doing work ahead of time you likely will save money on your repair bill (there also won’t be as much damage from the leak).
Start Inside
First, deal with the leak inside your house so you can minimize interior damage.
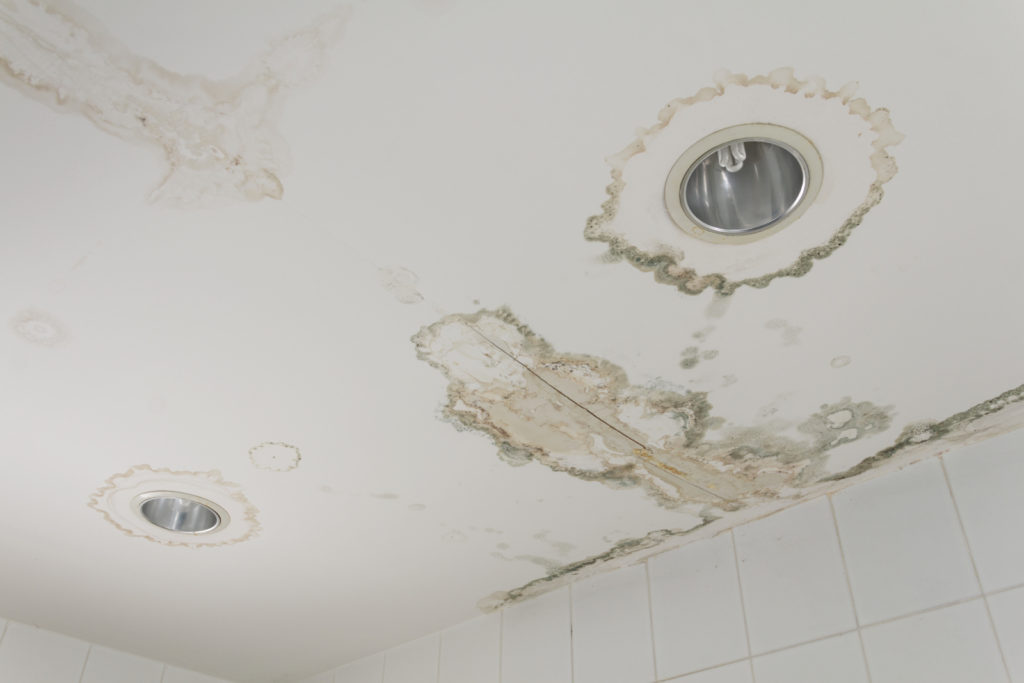
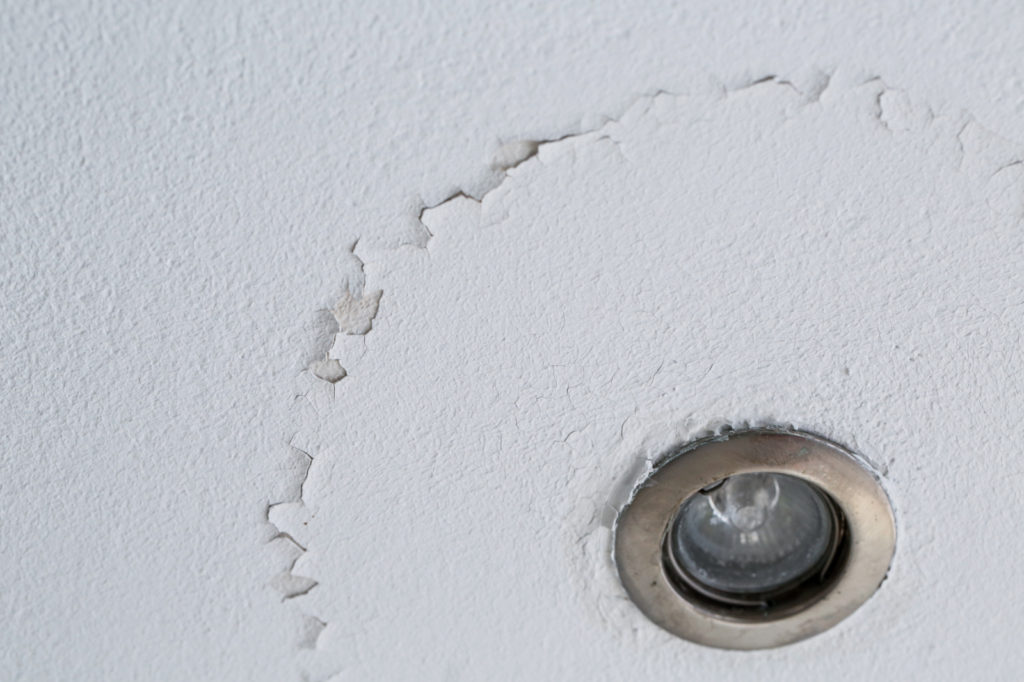
Most of the time, a roof leak will form a small puddle in the attic and/or ceiling until it finds an escape route. These escape routes are usually a light fixture, heating register, or something similar. Additionally, where the ceiling boards meet (the junctures) and corners are other spots where leaks will often occur. Occasionally, these leaks happen in multiple places and yet originate from one source, making it look much worse than it usually is.
The immediate thing to do is put something under the leak (bucket or large cooking pots) and move any furniture or other articles in the room that could be damaged by water/moisture - off of the ground or away from the leak. You may also want to put drop cloths, garbage bags, or tarps on the floor to make sure that carpeting and flooring also stay dry.
 If the ceiling is holding water or bulging, or you see a bulge in the drywall, you need to get a large container to hold water! Usually a garbage can with wheels is best as it can hold a considerable amount of water and yet has wheels for easy movement. Once the container is in place beneath the bulge, use a screwdriver or something similar to poke a hole in the center of the bulge. This will drain the water at that one spot, which will help lessen the damage to the ceiling and help collect the water into one stream.
You may further need to remove damaged drywall or ceiling tiles, but once things are under control inside, it’s time to find the source of the leak.
Finding the Source of the Roof Leak
It can be quite difficult to find the source of a leaking roof. However, if you don’t find the source of the leak, any repairs or temporary fixes you do are going to be useless. Water is tricky and can travel far from the origination point and cause damage elsewhere.
So, you want to start by locating the roof leak on the inside of your house. If your ceiling is bulging, it is likely from your roof, but there are other possibilities. Some of the possibilities for household leaks include plumbing, heating and cooling units, condensations, pest infestation or even clogged gutters.
Explore and investigate. The leak in your ceiling or wall will often appear not to align. This is when you will want to remove damaged drywall or ceiling tiles to see where the leak is coming from. Besides making it easier to find the source of the leak, it will help dry out the water-damaged space.
The Attic
If you’re pretty sure the leak is from the roof, the best place to start may be the attic. Your roofing materials are almost always over a layer of plywood. This means that water will often travel from the leak area in the roofing material to the nearest juncture in the plywood (The water travels underneath the roofing material once it gets under).
Grab another bucket or large container and a flashlight! You may need to catch more water closer to the source. If your attic insulation is fiberglass, wear gloves and eye protection as well. AND, grab a board or two; you may need them.
IMPORTANT! (Here's where the boards come in). If you are catching any water in the attic, do not put your container right on top of the ceiling tile or drywall because it could fall through when it fills up with water. Instead, put a piece or two of scrap wood, or boards, across the joists and put the bucket on them to catch any leaks.
Clear out any wet insulation that you find. If there is any standing water, soak it up with a sponge or rag until it is dried off.
Be aware that the location of the entry point into the attic may be in a different area than where the leak is coming through your ceiling. Do a thorough investigation of the attic to locate the source. Often, you can trace the path along a rafter, but water also sometimes follows the underside of the roof deck.
 If it is still raining, check the leak and note what surface the leak is dripping from. This means you will closely examine the underside of the rafters and the sheathing. You’ll want to look for water spots, drips or stains on the woods, or signs of mold growth.
Additionally, check the insulation in between the ceiling joists to see if there are any signs of water damage, mold, or stains. Clear out any wet insulation. You may have found where the leak enters your home, but it may not be where it originates. Look for any other signs that lead to that spot.
The Roof
Do not attempt to examine your roof while it is raining. Exercise extreme caution when going on the roof. Be sure to take adequate safety precautions when you do examine your roof. Wear rubber-soled shoes and be sure your ladder is secure. Again, wait for rain or wind to quit before examining your roof.
Tarp is your quick and easy temporary solution until your roofer arrives.
 You’ll need to cut the plastic so that it adequately covers the damaged area. Measure enough tarp to cover a section of the roof from the eave to the ridge, and then add an extra 4 feet. Cut it from the roll with a utility knife. Make sure the tarp is extended over the ridge line, otherwise water will simply run under the tarp and you will still have the same problems.
Secure the tarp with 2 x 4 boards. Staple or nail the tarp to the boards (not the roof!). Be sure that the nails you use are not so long that they will go through your roof.
Prevention
Leaks can often be prevented by doing preventative maintenance on your roof. Many roofs have places that will leak when water is not allowed to flow properly. This is very common on pitched roofs at inside corners.
Further, any blockage can cause a leak, but especially those blockages in gutters or downspouts. Clearing out leaves and debris and thereby allowing water to flow normally can immediately make a leak go away. If you want to keep it easy for yourself, just call Lowry Roofing Co.
Lowry will make sure that your roof is ready for the weather. No worries for you! AND always inspections/estimates are Free!